Lived-in, party girl, or even sometimes called model
s street makeup is making a comeback this season! I really love it when everyday makeup looks can be inspired by looks seen on the runway. In this case, even by the models once they’re off the runway.
s street makeup is making a comeback this season! I really love it when everyday makeup looks can be inspired by looks seen on the runway. In this case, even by the models once they’re off the runway.
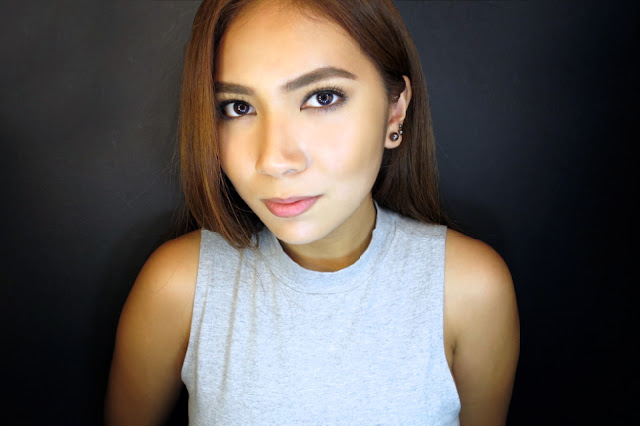
This look has always been a favorite of mine, especially when I feel like steering away from the typical girly and polished looks that I often do. To me, there’s just something so sexy about it. It’s perfectly imperfect, and it makes you look effortlessly chic. The idea of the makeup is that you look like you rushed putting it on, but you still look stunning. Here are some images of models sporting the lived-in makeup look:
As you can see, the look is heavy on the liner and usually looks best with a brow that's a little disheveled and undone. You'll also notice that cool-toned products as well as lips on the paler side are better for this look. By cool-toned, I mean colors on the stone or taupe side. If you're feeling a little adventurous and wanna try this look out, then you're in luck! Here's my guide on how to achieve this look on your own!
First thing's first, I believe the trick to really rocking this look is to have the perfect base. You can opt for a dewy or matte finish, but in my case I chose a satin finish for my skin to get the best of both worlds. You have to make sure you conceal your eye bags extremely well otherwise you'll just look like...a mess. Haha! I'll explain why later!
Starting with the brows, fill them in with a taupe or stone colored powder. Again, we're sticking to cooler toned browns. Then, it's important to take a brow gel and brush them upwards for that sort of messy disheveled look. Here I'm using MAC's brow gel in the shade Beguile, an old favorite of mine!
To contour, select a cool-toned shade. Here I'm using the shade Fawn from my Anastasia Beverly Hills Contour Kit. You want to avoid making your contour look sharp for that effortless feel. To do so, I just took my angled brush and contoured my cheekbones in a circular motion as opposed to my usual technique of going in a straight line.
Your contour should end up looking likes this, almost undetectable but still gives definition.
For the eyes, I used a matte, taupe colored eyeshadow called Power Player from my Tartelette Palette.
From left to right:
1 - Blend the taupe eyeshadow all over your lids. It should be blended high enough to be able to peek through when your eyes are open.
2 - Take a black, grey, or brown Kohl Pencil and line your lash line. It's really up to you which color you would prefer, but I love the way this MAC Eye Kohl looks in the shade Charcoal. You get the intensity of black without seeming too gothic.
It's also up to you how thick and intense the line to be, but I suggest just making it medium in thickness since we'll be smudging it out. There's no need to be super neat in this step but do remember not to neglect your upper lash line. I just hate it when there's flesh seen!
3 - Take a stiff liner brush and quickly smudge out the line you drew making sure it looks hazy and kind of smokey.
4 - Do the same steps in numbers 2 and 3 to your lower lash line.
Next, you want to make your eyelashes as dramatic as possible. To do this, curl your lashes then take your favorite black mascara and wiggle it from the root to add even more definition to your eyes. Optional: Pop on a pair of falsies like I did!
For me, applying mascara on your lower lashes is SUPER crucial for this look because it just makes the eyes so much more striking. I went a little crazy and applied about 3 coats. If you're wondering, I'm using my K-Palette One Day Tattoo Mascara. This is also one of my all time faves!
As for my lips, I wanted to add just a little bit of color so I used my current favorite lipliner from MAC in the shade Whirl. To keep it looking as natural and "lived-in" as possible, I diffused the color using a lip brush.
So here's the finished makeup look so far:
BUT WAIT! No lived-in look is complete without hair that looks like you haven't washed it in 2 days LOL. It really puts the whole look together. So I decided to spray some volumizing dry shampoo on my hair too add more life and character. I used my favorite XXL Batiste dry shampoo.
And there you have it! Perfectly messy hair!
Hope you guys wont be scared to give this look a try! You'll never know, you may just love changing up your look once in a while. Just make sure you wear it to the appropriate occasions! This is definitely not "meet the parents" kind of makeup HEHE.


No comments:
Post a Comment