Lived-In Liner Tutorial

Lived-in, party girl, or even sometimes called model
s street makeup is making a comeback this season! I really love it when everyday makeup looks can be inspired by looks seen on the runway. In this case, even by the models once they’re off the runway.

This look has always been a favorite of mine, especially when I feel like steering away from the typical girly and polished looks that I often do. To me, there’s just something so sexy about it. It’s perfectly imperfect, and it makes you look effortlessly chic. The idea of the makeup is that you look like you rushed putting it on, but you still look stunning. Here are some images of models sporting the lived-in makeup look:


As you can see, the look is heavy on the liner and usually looks best with a brow that's a little disheveled and undone. You'll also notice that cool-toned products as well as lips on the paler side are better for this look. By cool-toned, I mean colors on the stone or taupe side. If you're feeling a little adventurous and wanna try this look out, then you're in luck! Here's my guide on how to achieve this look on your own!

First thing's first, I believe the trick to really rocking this look is to have the perfect base. You can opt for a dewy or matte finish, but in my case I chose a satin finish for my skin to get the best of both worlds. You have to make sure you conceal your eye bags extremely well otherwise you'll just look like...a mess. Haha! I'll explain why later!
Starting with the brows, fill them in with a taupe or stone colored powder. Again, we're sticking to cooler toned browns. Then, it's important to take a brow gel and brush them upwards for that sort of messy disheveled look. Here I'm using MAC's brow gel in the shade Beguile, an old favorite of mine!

To contour, select a cool-toned shade. Here I'm using the shade Fawn from my Anastasia Beverly Hills Contour Kit. You want to avoid making your contour look sharp for that effortless feel. To do so, I just took my angled brush and contoured my cheekbones in a circular motion as opposed to my usual technique of going in a straight line.
Your contour should end up looking likes this, almost undetectable but still gives definition.
For the eyes, I used a matte, taupe colored eyeshadow called Power Player from my Tartelette Palette. 

From left to right: 
1 - Blend the taupe eyeshadow all over your lids. It should be blended high enough to be able to peek through when your eyes are open. 

2 - Take a black, grey, or brown Kohl Pencil and line your lash line. It's really up to you which color you would prefer, but I love the way this MAC Eye Kohl looks in the shade Charcoal. You get the intensity of black without seeming too gothic.

It's also up to you how thick and intense the line to be, but I suggest just making it medium in thickness since we'll be smudging it out. There's no need to be super neat in this step but do remember not to neglect your upper lash line. I just hate it when there's flesh seen!

3 - Take a stiff liner brush and quickly smudge out the line you drew making sure it looks hazy and kind of smokey.

4 - Do the same steps in numbers 2 and 3 to your lower lash line.
Next, you want to make your eyelashes as dramatic as possible. To do this, curl your lashes then take your favorite black mascara and wiggle it from the root to add even more definition to your eyes. Optional: Pop on a pair of falsies like I did!

For me, applying mascara on your lower lashes is SUPER crucial for this look because it just makes the eyes so much more striking. I went a little crazy and applied about 3 coats. If you're wondering, I'm using my K-Palette One Day Tattoo Mascara. This is also one of my all time faves!
As for my lips, I wanted to add just a little bit of color so I used my current favorite lipliner from MAC in the shade Whirl. To keep it looking as natural and "lived-in" as possible, I diffused the color using a lip brush.
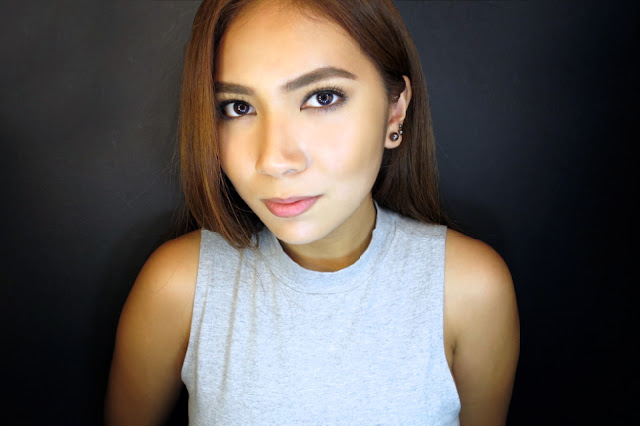
So here's the finished makeup look so far:
BUT WAIT! No lived-in look is complete without hair that looks like you haven't washed it in 2 days LOL. It really puts the whole look together. So I decided to spray some volumizing dry shampoo on my hair too add more life and character. I used my favorite XXL Batiste dry shampoo.
And there you have it! Perfectly messy hair!


Hope you guys wont be scared to give this look a try! You'll never know, you may just love changing up your look once in a while. Just make sure you wear it to the appropriate occasions! This is definitely not "meet the parents" kind of makeup HEHE.


Acrylic Nails


I've been a fan of the long nail trend for a while now but unfortunately, I have the bad habit of biting my nails which is why I've never been able to grow them as long as I want to. Thankfully, there's always the option of getting acrylic nails.

I didn't get to document the process of having them put on, but I just wanted to share with all of you my experience with them.
Acrylic nails start out with a "tip" made of plastic that are glued to the edge of your nail to give it length. It always starts out super long, then you can have it cut to your desired length later on. After that tip is attached, a mixture of a liquid and a powder is then slowly brushed on top of your real nail. Thanks to trusty old Google, I was able to research that the mixture is actually a mixture of a polymer powder and a liquid monomer which hardened after a few seconds of being exposed to air. The mixture kind of had a strong smell, but it didn't really bother me so much. Most nail salons will make you stay in a separate room as to not bother the other customers with the smell.

Once your acrylic nail has completely dried, then you can have the nail cut and shaped whichever way you want. I opted for an almond shaped nail since I didn't want the usual oval or square. (Thank you neighbors for letting me take pics with your pretty plants lol)
Overall, Acrylic nails grow out with your real nails and it is recommended to return to the nail salon to have them filled in after about 2-3 weeks.  

Overall, I'm really happy with my acrylic nails. I'm not gonna lie, I thought they were such a hassle on the first day, but eventually I just got used to them and learned how to manage. My lifestyle requires me to use my hands a lot since I set up my makeup chair and carry all my makeup around, which is why I'm surprised that they actually last on me. Of course I take extra precaution when I do certain activities like exercising or typing, but nothing too extreme. It has become one of those things that accessorize my outfit and they look great with a ton of rings! Call me shallow but it also makes me really happy to see them while I'm putting makeup on a client hehe.

Thank you to the folks over at Nailogy for my nails! Their prices for acrylics range from P1200-1700 :)

Portfolio: Young Star

Happy Friday everyone! I’ve been so busy with makeup bookings lately that I haven’t found the time to make you any tutorials. Huhuhu I really apologize for that, but I plan on making one ASAP don’t ya worry!

Anyway, before the portfolio entries start piling up, let me share with you a few photos from my work for the Young Star shoot for their YS Prom! This was such a dream shoot for me because the peg for the shoot was a glossy lid, which was something I've never done before. Not to mention that my models were Melissa Gatchalian and Kimi Juan.

These amazing film photos were taken by Ralph Mendoza!

Since the peg was a glossy lid, I thought that it would be matched perfectly with a couple of strobing techniques I like to do. For those of you who don't know what strobing is, it's basically the use of illuminating products instead of contouring products to cheat your way to a better looking facial structure.

As you can see, Kimi's skin is glowing so beautifully! To achieve this, I used a combination of Shu Uemura's Glow Creator, Benefit's High Beam, and Hourglass Ambient Lighting Powder in Incandescent Light. I applied these products on their cheekbones, temples, brow bones, tips of their noses, and chins.
Ideally, contouring products shouldn't be used when you're strobing but I just used a little matte powder a few shades darker than Melissa and Kimi since I'm a sucker for perfect cheekbones hehe.
For the glossy lids on the other hand, I did my research on some methods to achieve it and I found that lipgloss or petroleum jelly works perfectly! I used one slightly shimmery taupe shade on their eye lids and gently applied a layer of lipgloss on their lids. I was terrified that it would turn out messy, but thankfully I loved the way it looked!
 The rest of the makeup was kept super simple. I barely used eyeliner, just lightly tightlined and applied a natural pair of falsies on Kimi. For Melissa, I opted for a thicker pair so that her eyes would stand out more. I then filled their brows with my favorite Shu Uemura Hard 9 pencil for a super natural finish.
 And to finish, I used a semi-matte shade of pinkish nude lippies on the two ladies.
That's all for now! Don't hesitate to ask me anything on my ask.fm account! :)

Portfolio: Patty & Kelly


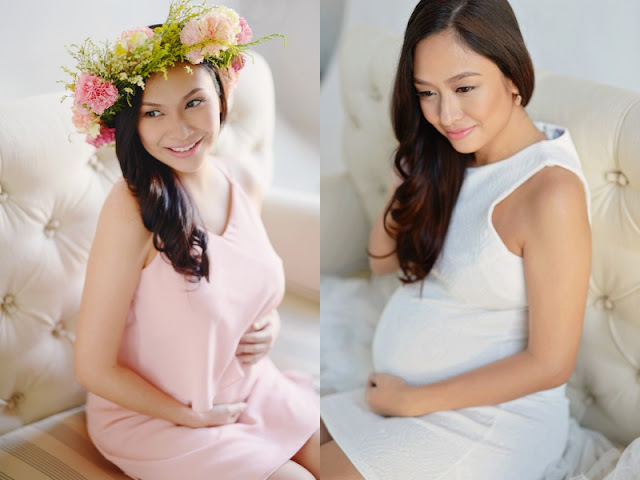
A few weeks back, I had the privilege of doing the makeup for 2 lovely preggies (now mommies) Patty Laurel and Kelly Misa for a shoot for Cord Life Philippines! I don't know if it was the famous pregnancy glow or just their super sweet and bubbly personalities that made them sooo beautiful. You can really see it shine through in their photos. The peg for the makeup was simple, natural, and fresh! My favorite kind of makeup! Check out the photos from the shoot below. :)

See what I mean? These mommies were a breeze to put makeup on!
 Here's Patty wearing one of the super pretty flower crowns which I drew my inspiration for the makeup from. I used a lot of subtle pinks and peach tones on their faces.
My favorite Too Faced Chocolate Bar palette was used to create soft eye looks. Here on Kelly you will see that I didn't do anything too cut-crease. I kept it all soft and well blended.
  I also made use of a natural pair of falsies so that I could keep the eye defined without having to use too much eyeliner.
The perfect shades of soft peach blush really brought the makeup together. For blush, I used my NARS Virtual Domination palette.

 And of course, you can never go wrong with Happy Skin's Shut Up and Kiss Me Lippies. Here I used the shades Just Say Yes (Patty) and Summer Fling (Kelly).


 Congratulations to these two gorgeous mommies! It was a blast working with them and hearing them exchange some of their pregnancy stories haha! Hopefully I'll look just as good when the time comes that I'll be having a baby. In like 10 years...NOT SOON OKAY GUYS?? HAHAHAHA!

Photos taken by Jaja Samaniego and the team from Happy Folks Studio You may find the rest on Patty's blog here
Styling by Margaux Alampay
Hair by Marie Tan

FOTD: Preview Ball

Hiiii guys! Sorry I’ve been gone for such a long time huhu. It's been a little hard for me to juggle my school work and clients for the past month but hopefully I'll get back on track with the blog starting now!

So as some of you may have seen on my Instagram, last weekend I was fortunate enough to attend the Preview Magazine's 20th Anniversary Gala. Being such a milestone for the magazine, they decided to make this year's attire "Creative Black Tie." Initially, I freaked out cause I didn't know how to pull off such a look in a short amount of time, but thankfully I ended up really happy with the way my whole look turned out.

Some of you guys asked me what makeup products I used and stuff, so I'm here to share as much as I can about my makeup for that night with all of you. Below you will find a selfie I took when I got home from the gala and some amazing shots taken by my friend Kara (ily).

For my eye makeup, I used very neutral shades of eyeshadow in order for the liner and lashes to stand out more. For my eyeliner, I used Benefit's new They're Real Push Up Liner to create that perfect cat eye. I wanted my eyes to still look wide even if I was wearing so much eyeliner, so I opted to only line my lower lash line 2/3 of the way in. And I completed my look with a pair of Freshlook contact lenses in the shade Amethyst. These new products have become my latest obsession.

Moving on to the skin, I wanted it to look healthy and glowing. To achieve this, pre-makeup skincare was crucial. I used Urban Decay's Vitamin Infused Complexion Prep Spray with MAC's Mineralize Moisture Gel Cream to nourish and moisturize my skin before I applied a small amount of MAC's Studio Finish Foundation followed with NARS' Radiant Creamy Concealer. I only brushed a small amount of setting powder for my concealer but left the rest of my face alone.

My contour and highlight was my favorite part of my makeup, and I definitely used more product than I normally would. But hey, how often do you get to wear supermodel cheekbones right? I used my trusty Anastasia Beverly Hills Contour Paletter with my favorite MAC Mineralize Highlighter in the shade Lighscapade to enhance my cheekbones.
Moving on to my hair, this wet, slicked back hairstyle has always been one I've been meaning to try, but of course it's not suitable for every day. But for this special occasion, I figured it would be the perfect way to balance out how sweet and romantic my dress looked.

 Here's a photo of the overall look!

And that's it for this Face of the Day. Stay tuned for my upcoming posts about my collaboration with Benefit Cosmetics! :)